I rescued this old forums post quite a while ago with the intention of posting it up a year ago. Well, the road to hell is lined with good intentions and posts that languish in draft mode!
As far as I have been able to discover, rice bran pickling is unique to Japan. I could not find any instructions or discussions pointing to native nuka-style pickling in Korea or anywhere in China/Taiwan. Nuka-style pickling appears relatively unknown in the US until recently–it seems to have blown up online this last summer, which was wonderful since I could actually troubleshoot this recipe at last.
Nukamisozuke (nuka = rice bran; miso = fermented paste; zuke = preserved/pickled/fermented) is a pickling technique which uses a fermented bed of rice bran with added salt. It’s a lactic pickling method and, once you have your bed going, it pickles your fruits and vegetables (and even meat and fish) very quickly–we’re talking hours. Despite the name, there is no miso added to the bed. You could certainly add some for flavor if you like, but then your pickle would be more of a misozuke and less of a nukazuke. The “miso” just refers to the fermentation and paste-like consistency of the pickling substrate. Numamiso is the pickling substrate, nukazuke/nukamisozuke refers to the items pickled in the nukamiso. Nukadoko is another way to refer to the pickling bed.
The bed is alive during the whole process. This is a perpetual pickling substrate that with five or so minutes of time each day can live for decades and be shared with friends and family. In our house, we refer to it as a pet. It gets stirred once or twice a day, and if we are leaving for more than one or two days, we actually take some trouble to store the bed so that we can take it out when we return and get back to picklin’. The goal is to maintain active colonies of friendly yeasts and bacilli which impart a good flavor to your pickles. This pickle does require more time investment than pretty much any other method, but the result (daily fresh pickles!) is worth it, in my opinion. If anyone reading has made takuan, you might notice some strong similarities between the methods.

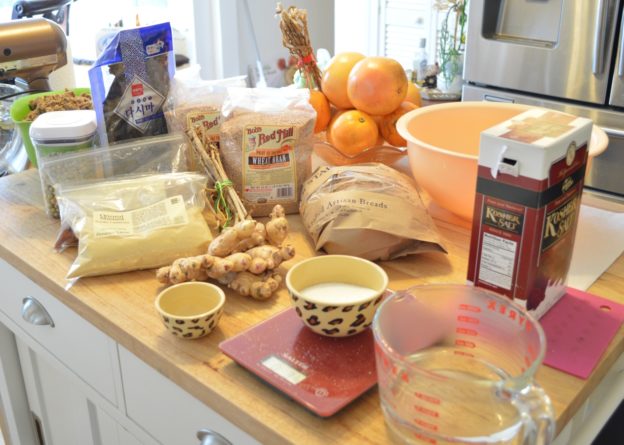
Everything you need to start out, and then some!
To prepare a basic bed, you’ll need the following:
- Rice or wheat bran
- Non-iodized, unflavored salt (kosher, sea, or pickling salt are all great)
- Kombu (a type of dried seaweed)
- Dried chile peppers (I use tien tsin)
- Fresh ginger
- Plain white or wheat bread, not multigrain
- Optional: mustard powder, whole dried soybeans (or other dried beans), beer, garlic cloves
You will also need an appropriate container. If you’re lucky, you might have a Japanese market nearby which sells the traditional wooden, lidded bucket that an oldschool household’s nukadoko lives in. Ceramic, glass, and food-safe plastic vessels also work. I advise against bare metal containers, though an enameled one would work fine. The substrate has a low pH, so it might interact unfavorably with exposed metal (bad flavors, leaching, rust). The container should be large enough for the amount of substrate you intend to make. You do not need to have a fitted lid, especially since the substrate requires exposure to air. Cheesecloth, a tea towel, or a clean undershirt will all work fine. Lastly, I strongly advise the use of a scale to measure your ingredients. Following the ratio is critical for scaling the recipe up or down.
The few recipes I found early on were all for huge portions of nukamiso, but some writers have been kind enough to specify the basic proportion: salt to rice bran. If you live in a temperate climate, you should start with 12-13% salt to the mass of your dry bran. If you live somewhere colder, you can scale that down closer to 10%. If you live somewhere warmer and you need to slow down fermentation, you can go anywhere from 15% – 17%. Hitting 17% is going to result in a really salty pickle, though, so I wouldn’t start that high. Ikuko Hisamatsu, who wrote the wonderful Quick & Easy Tsukemono: Japanese Pickling Recipes, starts out with 15%. I found that to be a little too salty for my tastes and it inhibited the bed’s start. After that, it’s one part water to one part bran for the most part. Wheat bran is much fluffier than rice bran, so I felt the need to add more liquid while using wheat. I found that other people felt the same way. If your bran is really dry, you may find that you add more water on day one or so.
Amounts for a modestly-sized nuka bed:
- 10 oz. or 285 g bran
- 2 oz. or 59 g salt
- 10 oz. or 285 g water, preferably filtered, with additional water set aside for mixing
- 4 dried chile peppers
- 2 square inches of kombu
- 1 knob of fresh ginger
- 1 slice of bread, torn into small pieces
- Vegetables!
- Optional: 1 oz. mustard powder, fistful of dried beans, beer, peeled whole garlic cloves
Heat your measured water enough to dissolve the salt. Add the bread and let cool to room temperature. Bread helps provide food to the germs you’re trying to invite into the nukamiso. It’s not strictly necessary, but it is helpful.
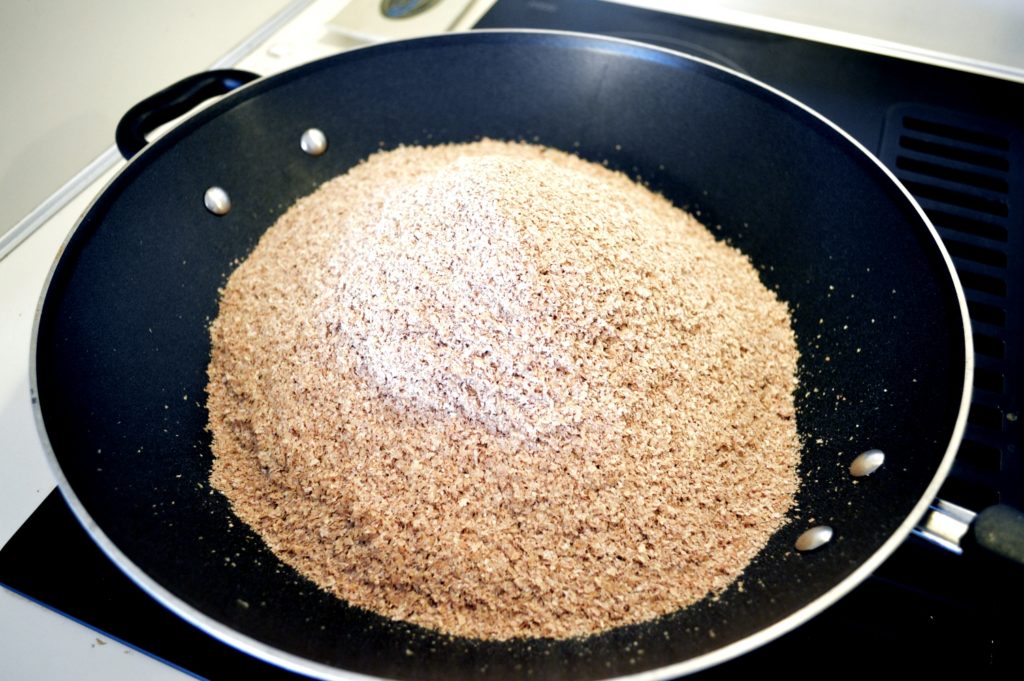
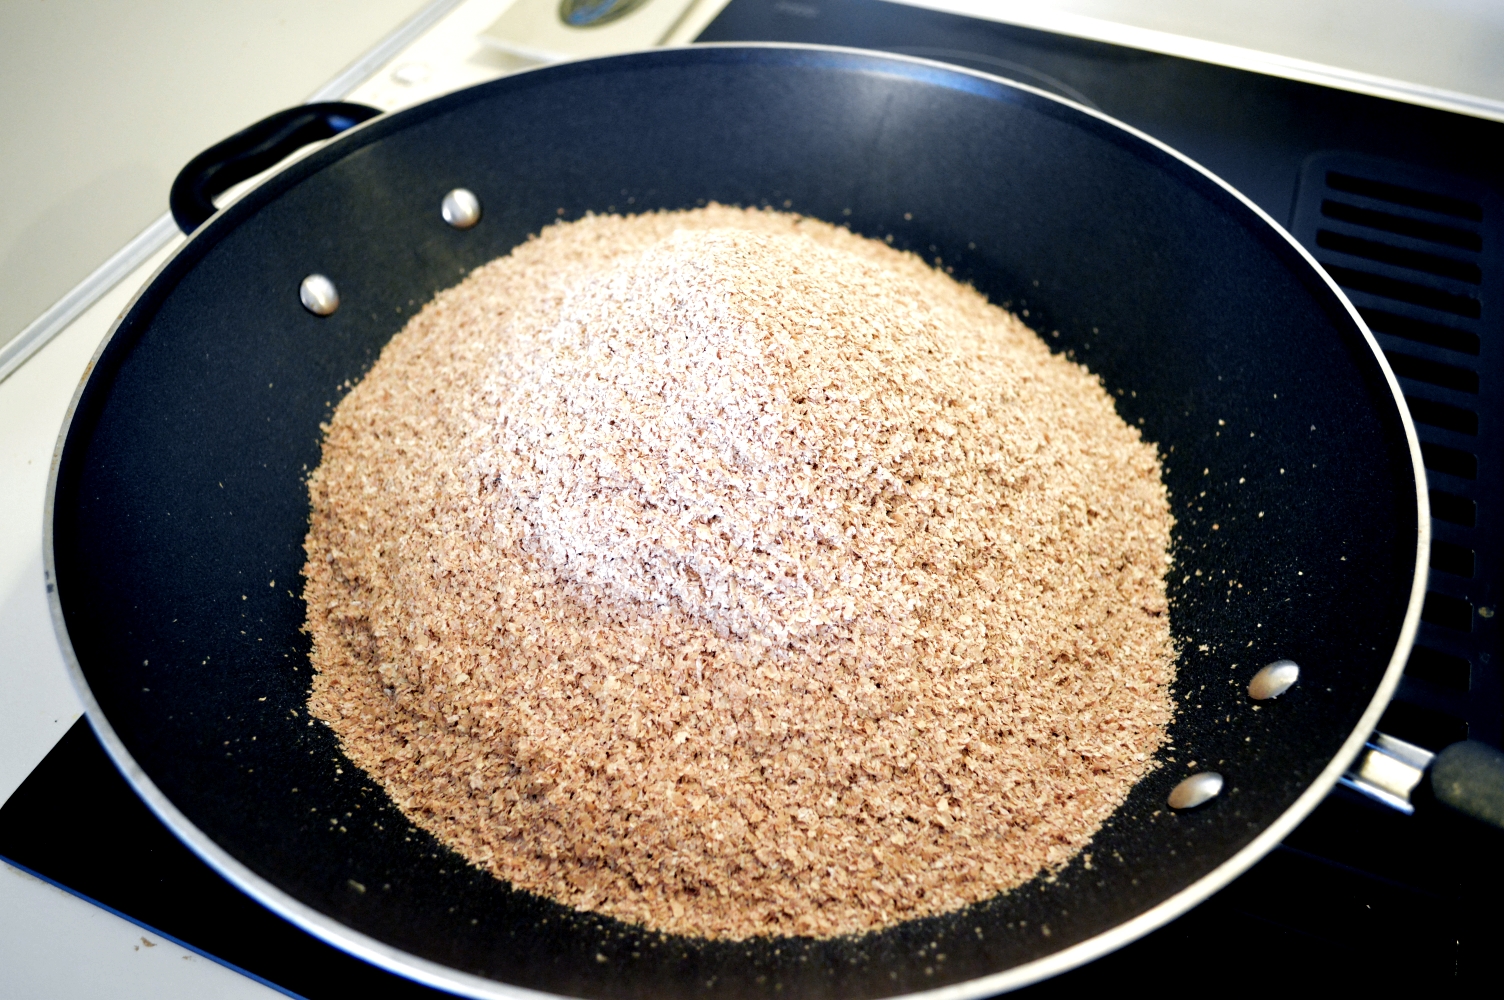
This is nuka, or rice bran.
Heat a large wok or pot over medium until a bead of water will bubble away, then add bran and stir continuously until you can smell it toasting. Your bran may smoke a little, which is fine. Do not allow the bran to burn. Pour the toasted bran into a large bowl and let cool. Toasting drives off staleness and imparts a nutty flavor.
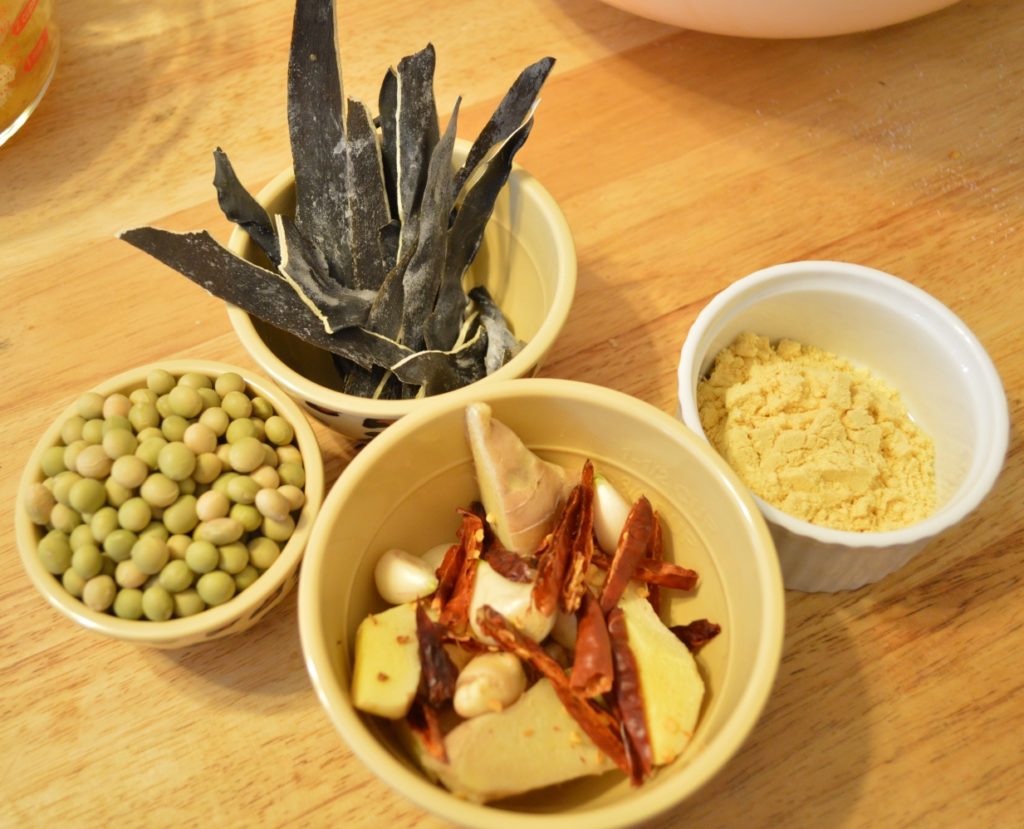
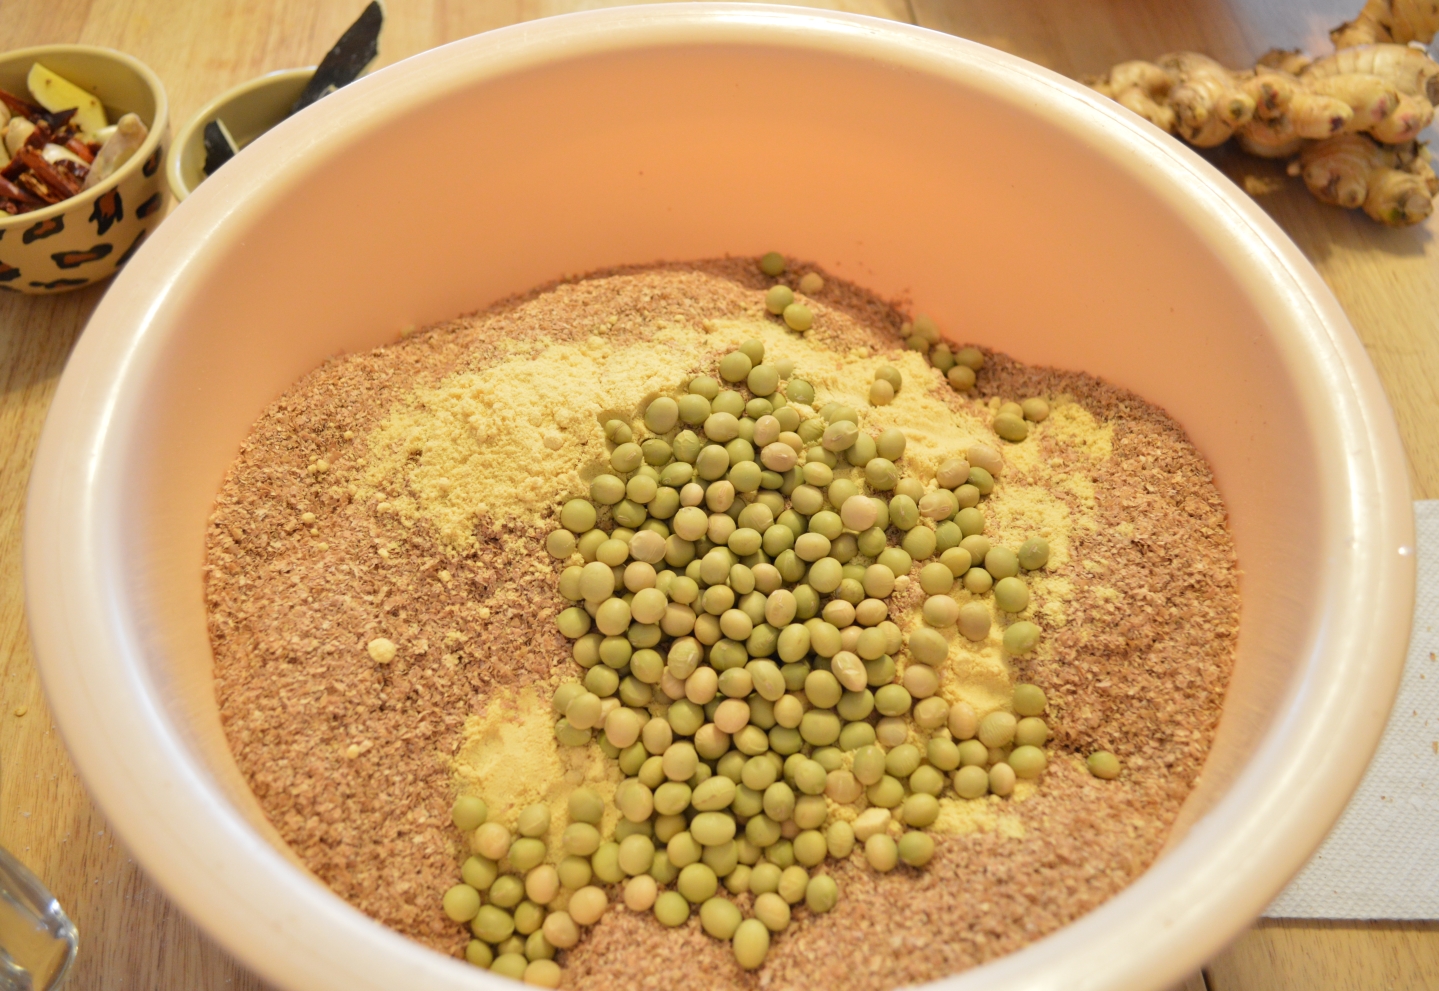
Here are just a few additional ingredients.
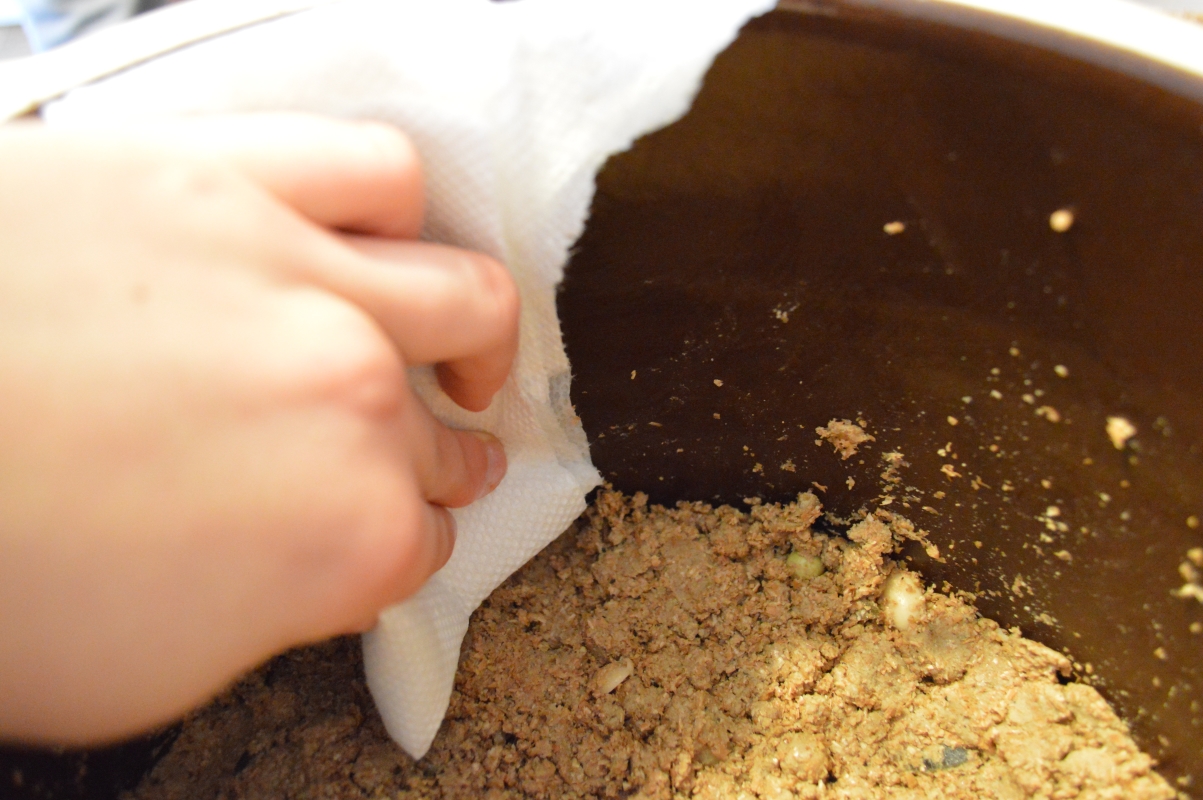
While you wait, prepare your seasonings and vegetables: Wipe your kombu with a moist paper towel and then cut or shred into 1 cm wide strips. Cut the chile peppers lengthwise into two pieces. Scrub the knob of ginger, pare away any dried up or dirty spots, and cut into four pieces any which way. Don’t use shriveled up or even slightly moldy ginger. It needs to be top shape, because this is to add to the health and flavor of your bed and it’ll probably stay in there a long time. Likewise, the garlic cloves should be spotless. For tester vegetables, clean leaves from turnips, beets, cabbage, radishes, and other brassica-family plants are great. So are whole or split carrots/parsnips, turnip rounds, kohlrabi, whole small radishes, and the like. Make sure the starter vegetables are clean. You can even use kitchen scraps! It’s fine to use something a little past its prime here, just not something moldy of course. Your starter vegetables help inoculate the bed with bacteria to get the fermentation started, and they will also help you gauge your bed’s progress.
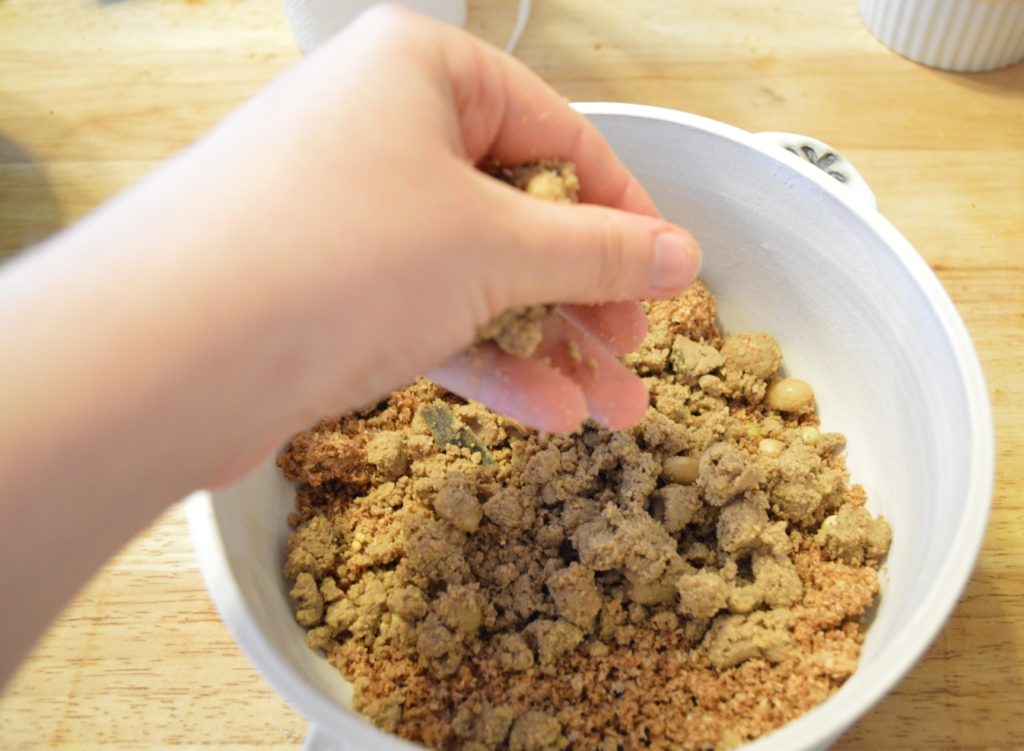
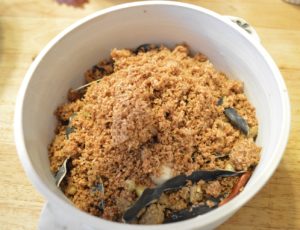
Once your bran has cooled, add your mustard and beans and give a swift mix. Then add the bread and brine and mix. Add more water as necessary until you achieve a soft but not liquid texture, similar to the resistance of your earlobe or wet sand. You don’t need to knead the bread, just mix.

Toasted rice bran, salt, mustard powder, and dried soybeans.
Options: If you have some nukamiso starter, you can add that to the new nukamiso at this stage. If you want to add some more moisture but are tired of boring-ass water, add some beer! A stout or IPA would be too strong, but a lager or wit bier are good and mild. Nothing fancy necessary. I’ve added a couple various ales to mine. It helps start fermentation and adds flavor. Besides, who doesn’t want to share a beer with a pet that doesn’t end in vet bills?
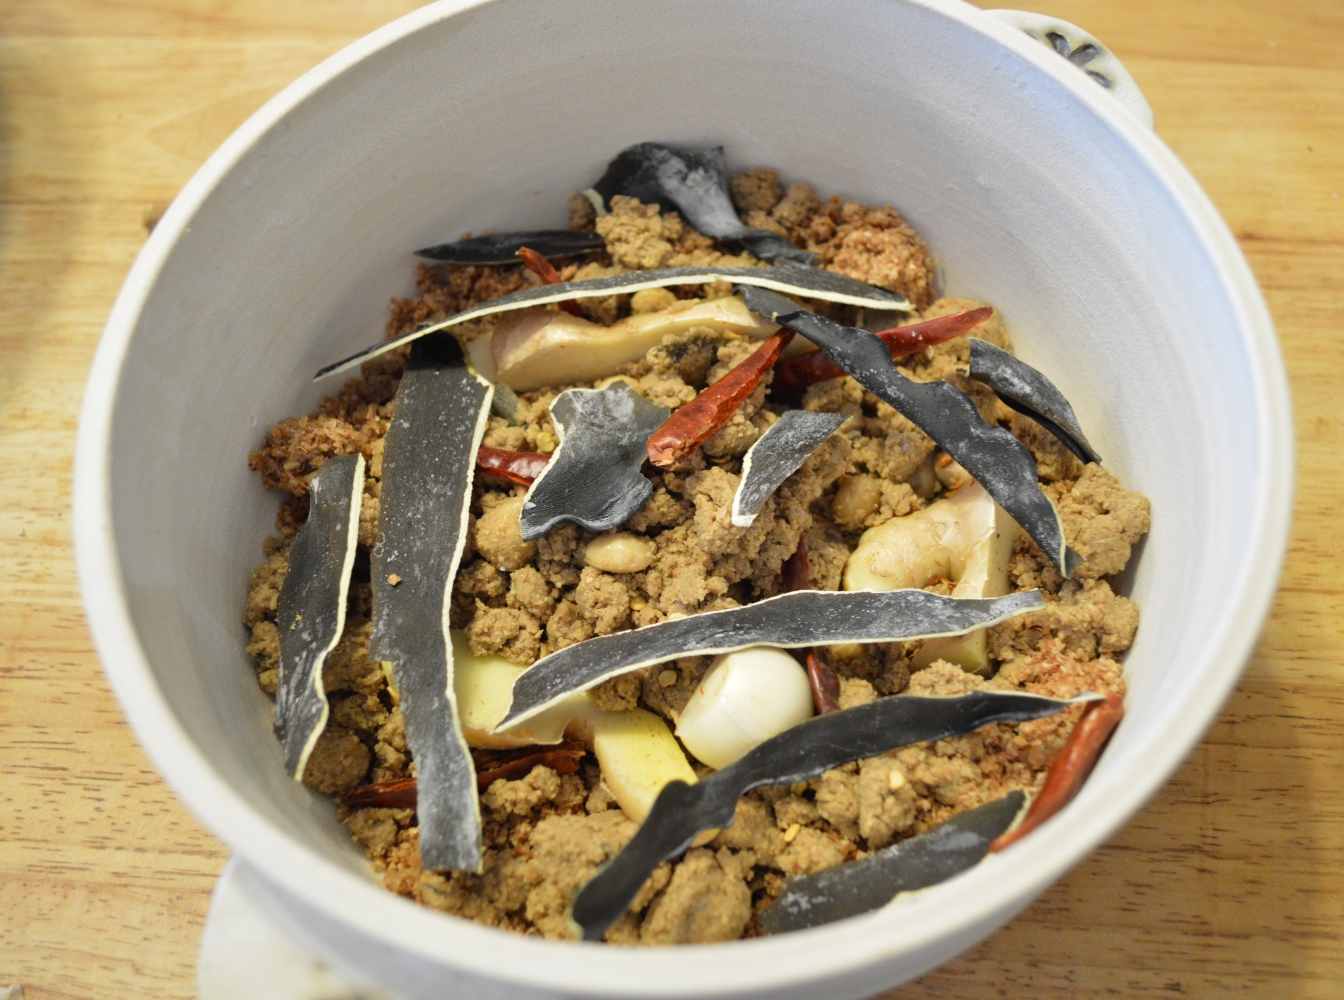
With your clean, dry nuka home ready, add half of the nukamiso to the container, making sure to cover the bottom (but don’t compress it much).
Yes, I used my bare hands. So can you!
*In this picture, I’m actually adding the starter nukamiso to the middle. That’s alright too.
Scatter the chiles, kombu pieces, ginger, and garlic cloves. Then cover with the rest of the nukamiso. If you find that your bed is still a little too dry, you can add more water or beer here. If you find that it’s too soggy, add more dried beans or a more bran.

Bury your starter vegetables.
Pat the top of the nukamiso down lightly until it’s mostly flat.

This is a second crock. I’ve patted the surface flat and am wiping the inner rim clean.
Wipe the exposed inner sides of the nukadoko container clean with a moistened towel, then cover with a cloth and place in a dry, dim, cool (but not cold–65F – 75F are solid parameters) location. A pantry, beneath a sink, in a closet, or in the basement are all pretty good locations. It needs to be somewhere accessible–it shouldn’t be hard for you to get to the container and stir it.
From here on, stir your bed once a day by hand. Your hands should be clean and without any lotions or scents, which can impart sour and narsty flavors to the nukamiso (and thus to the pickles). Using your hands helps colonize the bed with delightful germs. If you’re a germaphobe, this is a terrible project for you to take on, but you can try stirring using a wooden spoon instead. Stirring in this case is much more like crumbling. Lift up the compressed bottom portion of the bed, break up any clods, and make sure the substrate is nice and loose. You should also check each day that there are no molds growing and no horrible bugs nesting in your nukamiso. I haven’t encountered either of these events, as a healthy germ colony, mustard powder, and salt all help inhibit most fungi through competition and adverse conditions.
In about three days, you should start to smell a change in the bed. It will take on a nutty, earthy, slightly sour smell. Depending on your local conditions, this may take a couple days more. If you find that it’s taking a long time, you might go ahead and add some more beer. Swap out your tester vegetables each day. You can try them out to see how your bed’s flavor develops, but you will not have very tasty pickles until your bed is well colonized. This took about seven days for me, give or take. Starting out, your vegetables (especially harder or larger items like carrots, pumpkin, and burdock) may take a day or two to take on pickle taste once the colony has established itself. As the bed matures, this time will decline until you can have a whole salad radish nicely pickled within 4 – 6 hours. Compressing the nukamiso will increase the speed and intensity of the pickling process, but you risk your colonies going out of balance and turning the bed sour due to lack of air.
Stirring once a day every day is crucial. In hot weather, you should even consider stirring twice a day (say, once in the morning as you go about your bidness, then once in the evening when you want to fish out your dinner pickles.) Stirring allows you to incorporate air into the nukamiso mixture. This helps keep colonies of anaerobic bacteria such as lactobacilli in check, given that air is bactericidal and also carries competitive microorganisms. You want populations of anaerobic bacteria, but they cannot be permitted to grow out of control. Stirring regularly helps balance this.
Adding Flavor
The basic recipe is a solid basis on which to build a good pickling bed. Given enough time, everything you add at the start will mature and change in taste over time. The vegetables you pickle also add to the flavor of the bed.
- Whole szechuan peppercorns
- Whole garlic cloves. You can eat these, too, so keeping a rotation of pickled garlic improves the bed and yields an interesting pickle.
- More kombu! This adds a good deal of savoriness. Your kombu will likely break down over time as it absorbs liquid and is chewed on by germs. This is fine.
- Whole garlic knobs. Can eat ’em just like garlic.
- Dried fruit peels/zest strips: mandarin, apple, persimmon are all good places to start. Make sure the peels are well dried. In the oven at 200F until they become brittle works.
- Dried chiles – whole or powdered. I haven’t tried smoked chiles, but that would make an interesting bed.
Maintenance
The importance of regularly stirring your bed cannot be overstated. Stirring is the primary mechanism that prevents an infection of unwanted microorganisms by permitting oxygen to touch more of the bed. Oxygen exposure also helps the fermentation and leads to better flavor. Technique is more like breaking something up with a spatula than whisking stuff around. Dig your hands in deep, get down to those corners, bring them up, and destroy the clods. Try to keep the sides of your container relatively clean so as not to invite bad guests. Keep the top of the bed smoothed out (not pressed flat) to help a bit with this as well, and to make inspecting the surface easier.
As I wrote before, your hands should be clean and have no lotions or other potions applied. Those will contaminate the bed and cause off flavors and who knows what sort of gnarly shit.
From time to time, you will need to add more nuka, salt, and potentially water (depending on local humidity). This is just to replace the nukamiso lost from stirring and removing vegetables.
Vegetables get washed before and after adding to the bed.
Storage
For short-term storage, remove the nukamiso from its container and put into (clean) doubled plastic bags. Tie loosely, then put in the refrigerator. Your nukamiso will survive this for about a week. Once you return it to its (clean) home, make sure to stir it frequently for the next few days, as the surviving bacteria need to get a little kick-start to re-grow.
For long-term storage, make sure all vegetables and vegetable scraps are removed from the bed. Take out any garlic cloves or ginger knobs for good measure. Add extra bran to get the nukamiso thick and to balance moisture. Pat down the nukamiso and clean the inner sides of the container well with a moist cloth. Spread a double (or triple, depending on hole size) layer of cheesecloth over the nukamiso surface. Cover with about 1 cm of mustard powder, and then cover that with enough salt that you cannot see the yellow mustard anymore. Cover with a drop lid (or a plate that fits inside your container) and cardboard/thick cloth. Store in a cool, dark place until you are ready to retrieve the nukamiso. This will keep for months.
To reinvigorate a hibernating bed, take the lid off, then carefully remove the cheesecloth, taking care not to spill salt and mustard. Discard. Take about an inch off the nukamiso’s surface, as that’s going to be way too salty for flavor and pickling. You will need to add more bran and other seasonings to the bed, and might need to adjust salt and water content. Stir twice a day for a while until the bed has regained a nice smell. You’ll be doing tester vegetables again just like when you first started. As soon as those taste okay, you can get back to picklin’.
Troubleshooting
My bed is watery!
The easiest fix is to add a handful of beans to the nukamiso. Soybeans will absorb water and slowly enrich the flavor. Other dried beans are also acceptable. If your bed is really wet, give it a good stir, then add a clean sea sponge on top. Squeeze it out (into a sink) as it wicks away moisture. Another option is to give the bed a stir, smooth the surface, then make a hollow. Set a sake cup or similar small cup into the hollow.
A watery bed will quickly make the vegetables taste too sour and will take on a bad smell. The problem is pretty easy to correct, so take care of it quickly.
My bed is sour!
This and wateriness are the most frequent issues. Beds usually sour because they are not being turned frequently enough compared to the ambient temperature and the nukamiso salt content. The higher the temps, the more often the nukamiso needs to be stirred. Any bed can benefit from a twice a day turn, but it becomes necessary in the summer if you do not have the blessing of central air. If your bed gets a little sour, stir more and the problem will correct itself.
But the bed is super sour, you say? It smells a little alcoholic, you say? Then sterner methods are required. In addition to stirring more, you have a few more tools to wield. More salt, more mustard powder, umeboshi, and dried eggshells can help solve this problem. Start by adding a palmful or less of salt and a Tbsp or two of mustard powder. Stir those in. Mustard powder will kill microorganisms, and depending on the acidity of your bed (which is what you detect as a sour smell or taste), it may raise the pH. Calcium in dried eggshells will raise the pH. This counteracts the sourness and renders the bed less hospitable to lactobacilli. You want lactobacilli in the bed, but keeping that population in check is important to your food’s quality and safety. Umeboshi also has a high pH, so that contributes to balance and also flavor. Since they are salt pickled, umeboshi will also add more salt to the bed. Again, salt’s role is controlling bacteria colonization and growth rates.
I just rehabilitated a bed which had gotten a little of a solvent smell. It is once again smelling earthy and slightly sweet rather than like proto-moonshine. It took a week of turning before and after work, adding salt, mustard, and eggshells.
A note on prepping eggshells: just the leavings from breakfast eggs or whatever will do fine. Rinse them out in the sink and pop them into the oven on 200 for a while. I leave them in for a couple hours. Then crush them and add to the nukamiso.
My bed is moldy!
I actually have not encountered this issue. However, guidance from other sources all concur that if it is surface mold, you can take the surface off (go down about an inch to remove mold filaments). Then add more salt. This mostly occurs if you have not been stirring frequently enough or if your salt content has gone down too far.
I forgot some pickles in there!
Shit’s hella sour now, isn’t it? This can lead to excess water in the bed, too. For the soured vegetables, there’s a save!
- Wash them and slice, chop, or julienne. Soak them in clean, cool water to draw out the excess salt. Taste after about 15 minutes. If it’s good, you can stop here!
- Stirfry: For soured vegetables, prep as above, then stir-fry with a little sesame oil, garlic and/or ginger.
- Salad: Prep as in first line, then mix with toasted sesame seeds, some ginger, and/or other furikake. Add a little rice wine vinegar and/or soy sauce. I’ve minced up over-pickled radish and used it in vinaigrette. Works nicely!
I got bugs!
Theoretically, your bed can still be saved as long as any larvae have not penetrated beyond the first inch. The issue is similar to the moldiness: remove the first inch of surface, add more salt and stir. If bugs have penetrated further, dispose of the whole bed. In the future, remember to secure a linen tea towel or some layers of cheesecloth over your bed’s opening. Bugs are not welcome.
Some old school households use nukamiso started by somebody 30 years ago, so this is really a project you can do for a long, long time.